To reduce dimensional weight, measure the packed box, calculate the next lower weight band, and prototype the largest box that fits that band while protecting the contents. Once the packed item’s actual weight sets the billable weight, a further reduction in box volume may leave that weight unchanged.
Carrier guidance checked . The sizing example uses hypothetical packages and a published U.S. UPS divisor.
A smaller mailer can change the rate calculation before it changes the way a customer opens the box. The trick is finding a size that crosses a meaningful billing threshold and still leaves room for the insert, the closure and the product. This guide walks through a repeatable check you can use before ordering custom mailers or shipping cartons.
On this page · Measure the pack · Compare sizes · Copy the worksheet · Read the FAQ
1. Measure the package you actually send
Start with one repeatable order profile. Pick a single SKU or a common combination of items and use the same product, insert and packing method for each size you compare. Close the package as it will leave the packing bench. Record its maximum outside length, width and height, including any bulge, raised seam or corner that changes the envelope. Weigh the closed package with the contents, cushioning, labels and accessories in place.
Keep a second set of measurements for the internal fit. The buyer and box supplier need the product footprint, the tallest component, the insert profile and the usable inside space. The carrier needs the outside dimensions of the packed parcel. Write internal or packed external beside every dimension and keep the units visible. This distinction is especially useful when comparing different board grades or structures. YiHongBox box measurement guide.
2. Calculate the weight used for rating
When a service applies dimensional weight, volume is converted into a weight for rating. The comparison generally uses the higher of dimensional weight and actual weight, with the carrier’s rounding rules applied. UPS lists 139 for U.S. Daily Rates and 166 for U.S. Retail Rates in its DIM FAQ. Record the service, rate type and applicable account terms before selecting a divisor. This example uses whole-inch dimensions and a whole-pound actual weight. UPS package measurement and DIM guide · UPS rates by service and rate type.
DIM weight in pounds
Multiply the three rated outside dimensions in inches, divide by the applicable divisor and round the result up to a whole pound in this UPS example.
Billable weight for the example
Use the larger of rounded dimensional weight and actual weight.
Retain the unrounded measurements in your worksheet. The dimensions used in the calculation may differ from the raw measurement, so look up the rounding method in the guide for your service before setting a drawing target. Leave enough room for the actual packed sample to meet that target across normal variation.
3. Find where a shorter box changes the weight band
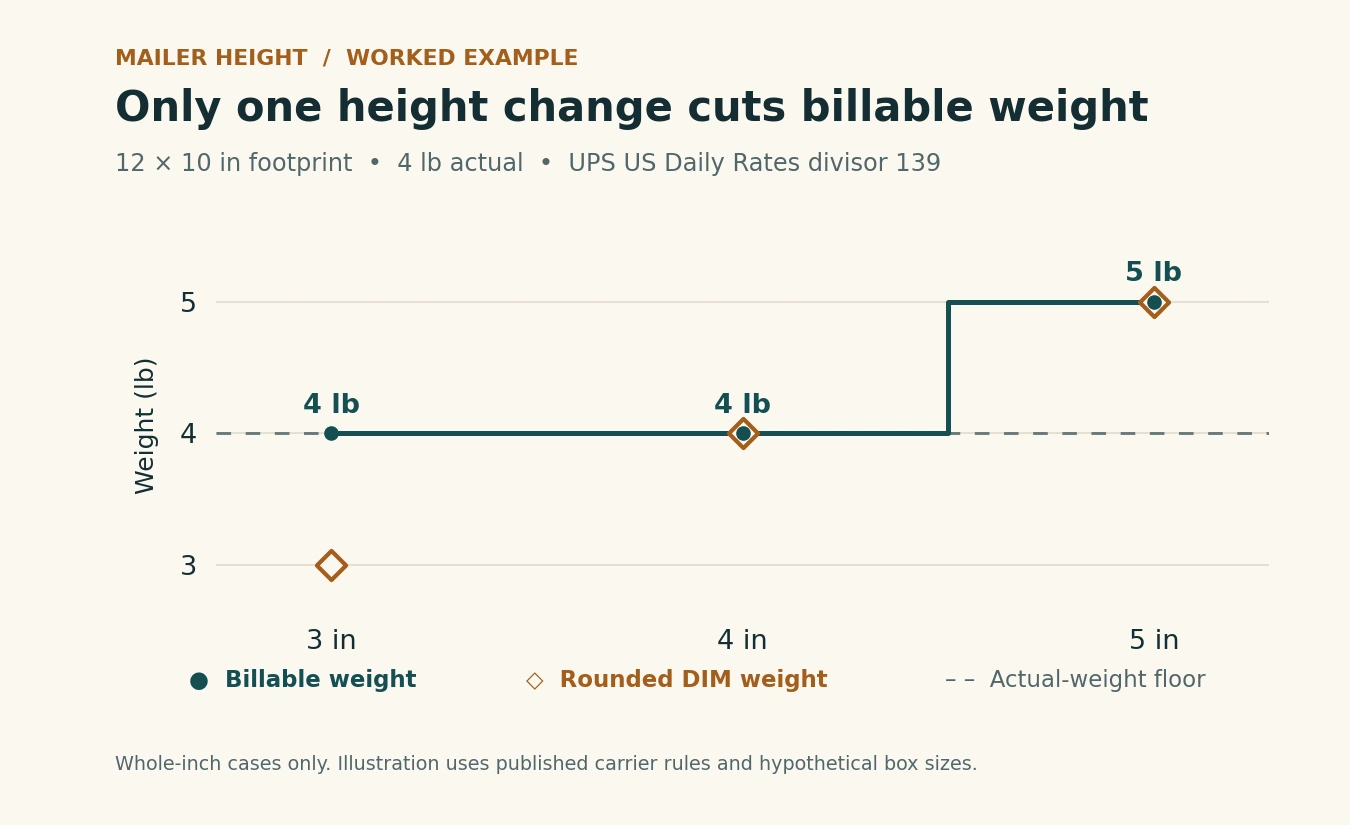
Assume the same contents weigh 4 lb fully packed in each candidate. Keep the outside footprint at 12 × 10 inches and compare three heights using a divisor of 139. The rows below show the calculation for each closed sample.
| Packed outside size | Volume | Raw DIM | Rounded DIM | Billable weight |
|---|---|---|---|---|
| 12 × 10 × 5 in | 600 in³ | 4.32 lb | 5 lb | 5 lb |
| 12 × 10 × 4 in | 480 in³ | 3.45 lb | 4 lb | 4 lb |
| 12 × 10 × 3 in | 360 in³ | 2.59 lb | 3 lb | 4 lb |
The move from 5 to 4 inches cuts outside volume by 20% and takes the example from a 5 lb band to a 4 lb band. At 3 inches, DIM falls again, but the parcel still rates at 4 lb in the example. If the 4-inch sample fits better, the last inch can stay available for closure clearance or cushioning. Compare the two billable weights using quotes for the same carrier, service, origin and destination to determine the actual charge difference.
Calculate a size target before you request a dieline
For the 4 lb DIM target above, the volume ceiling is 4 × 139 = 556 in³. At a 120 in² footprint, the largest whole-inch rated height within that ceiling is 4 inches. If the product needs 5 inches of outside height, a narrower footprint may work. An 11 × 10 × 5 inch box is 550 in³ and rounds to 4 lb DIM in the same example. Compare those two candidates against the shape of the packed product before you choose a design direction.
Measure actual weight again whenever you change board, inserts or packing materials. The 4 lb floor in this example stays fixed to isolate the effect of dimensions. In a real comparison, both weight and size can change.
4. Make room for the features that protect the product
Open the current pack and identify what uses the space above and around the product. A tall accessory standing upright, a folded instruction leaflet or an insert platform can determine the box height. Try a horizontal accessory pocket, a shallower insert or a different orientation where the product and packing sequence allow it. Check that the product can still be loaded and lifted without snagging and that each item remains seated when the lid closes.
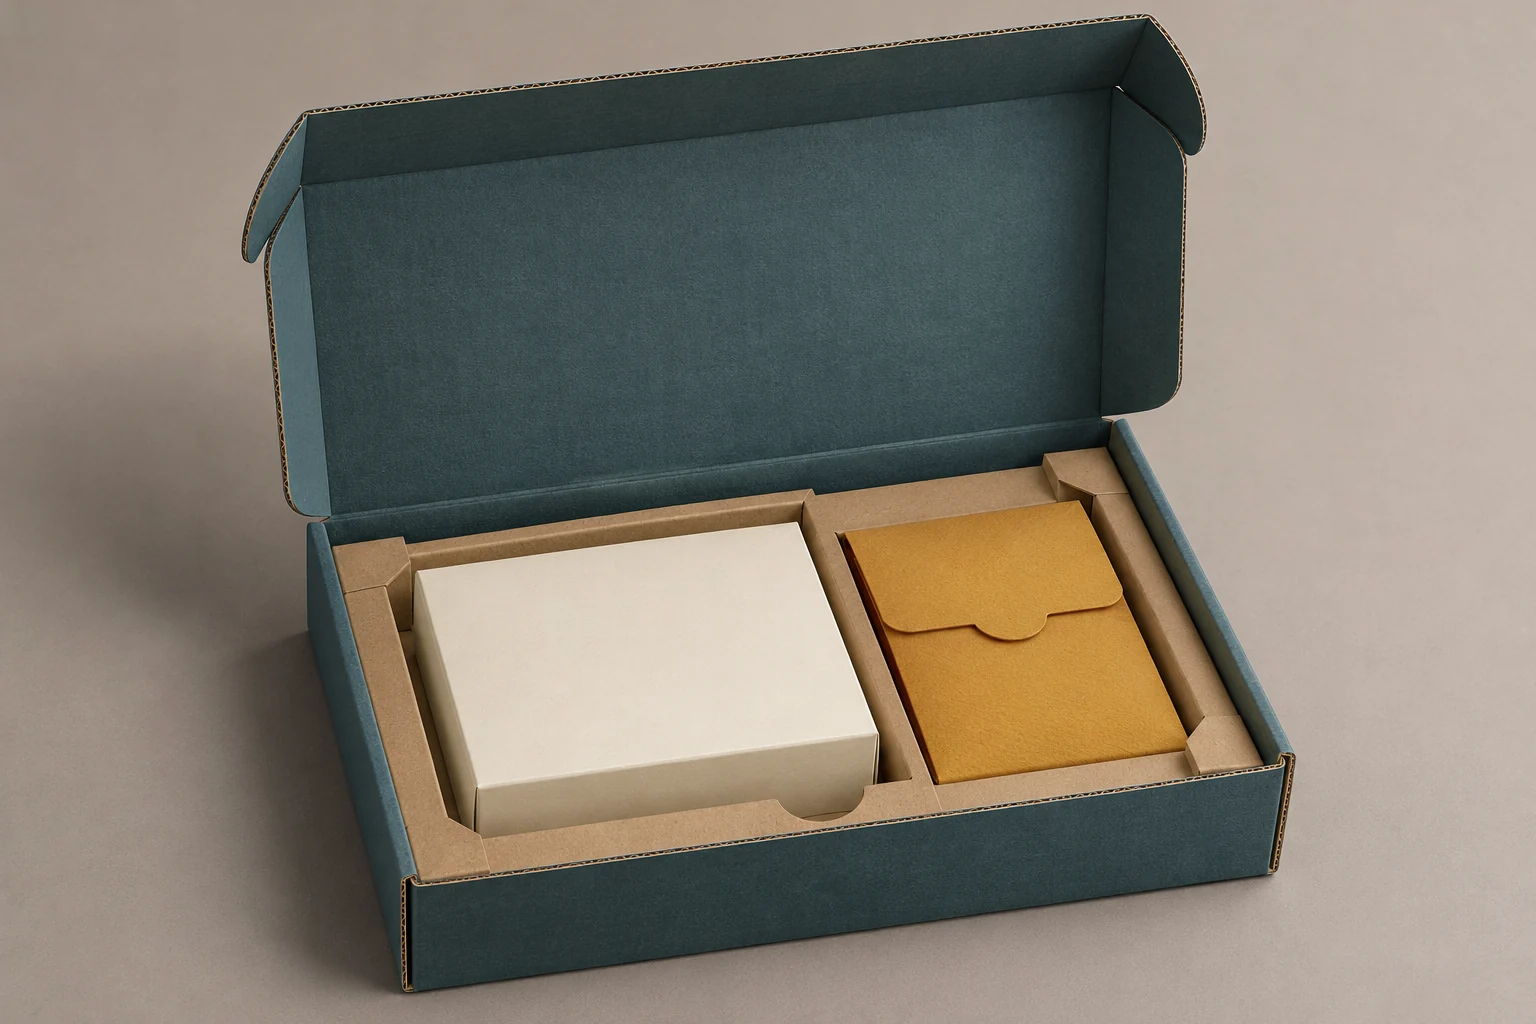
Use a fitted paperboard insert when the product needs defined support points. Select a custom corrugated mailer when a presentation lid suits the order profile, or ask about a corrugated shipping carton for other shipping layouts. Compare the outside footprint of assembled prototypes, because wall folds and closures can use different amounts of space. Mailer and shipping box comparison.
Trial the fully packed sample using the expected handling and distribution conditions. Check that the closure seats cleanly, the contents stay in their intended positions, and the packaging meets the agreed damage and appearance criteria. If a formal distribution test belongs in your approval plan, ask a qualified lab to recommend a procedure for the packaged product and its route. ISTA test procedure overview.
5. Record the sample before approving a bulk order
Copy these fields into your purchasing brief. Record one row of measurements for each tested pack configuration, and attach a photo of the closed sample alongside its revision number. Use the same service and lane for rate comparisons. For a mixed assortment, include the common order combinations and the tallest permitted combination so your team knows which orders the box can handle.
| Record | What to capture | Decision it supports |
|---|---|---|
| Sample ID and contents | Revision, SKU mix, insert and packing method | Repeat the same configuration |
| Usable inside size | Length, width and height with the insert fitted | Confirm fit and removal clearance |
| Packed outside size | Maximum raw dimensions and dimensions used for rating | Find the correct volume and margin |
| Packed actual weight | Scale reading, units and any applicable rating rounding | Identify the actual-weight floor |
| Carrier and route | Service, rate type, divisor, origin and destination | Compare on the same basis |
| Cost and fit result | Quoted parcel charge, packaging price, pack time and sample checks | Approve the combination that works |
A one-pound change in billable weight is a useful input to a quote comparison. Keep the new carton and insert costs, packing time and sample acceptance in the same decision. When you finalize the order, save the drawing, the approved physical sample and the external dimension target as a matching set. Packaging specification sheet for repeat orders.
Apply the same process in Canada and Australia
Canada Post uses the term volumetric equivalent and lists different density factors for named services. Its guidance lists 5,000 for cubic centimetres for services such as Xpresspost and 6,000 for Regular Parcel. Check the actual service before reusing a comparison. Canada Post density factors.
Australia Post describes cubic weight as volume in cubic metres multiplied by 250 kg/m³, with charging conditions that depend on the packaging and lodgement arrangement. Enter your own measurements using the stated units and check which rules apply to your parcel. Australia Post cubic weight guide.
Frequently asked questions
Which box dimensions are used for dimensional weight?
Use the maximum external dimensions of the closed, packed parcel and apply the measurement rules for the selected carrier service. Use the inside dimensions separately to check product and insert fit.
Can reducing box height by one inch change billable weight?
It can when the rounded DIM value crosses a lower band and actual weight allows that band. In the 12 × 10 inch example, moving from 5 to 4 inches drops the billable weight by one pound. The next inch leaves it at 4 lb.
What if the mailer bulges after it is closed?
Measure the packed sample at its greatest outside points. Inspect how the contents, insert and closure interact, then adjust the structure or orientation and measure again before committing to a rated size.
How do I compare dimensions if my drawing is in millimetres?
Keep the original raw dimensions and units in the drawing. Convert all three outside measurements to the unit required by the carrier method, then apply its rounding instructions and use a divisor or factor expressed for that unit.
Should I order one box size or several?
Start with order combinations that repeat frequently. Compare a shared size against a second size on volume, rated shipping quotes, order quantities, storage and packing steps. Keep a second size if the benefit holds after accounting for its added complexity.
What should I send for a right-sized mailer sample?
Send the fully packed contents and their weight, the existing packed outside dimensions, any insert drawings and a target shipping service. Include your desired fit and appearance criteria, quantity per design and destination.
Compare two mailer samples before committing to a size
Share your current packed size and the next weight band you want to evaluate. YiHongBox can review a practical box structure and insert layout for a paid physical sample. Standard MOQ is 1,000 units per size and printed design, with free design guidance. Include your delivery postal code if you want a project-specific DDP quote.